Showing posts with label collaborative. Show all posts

Monday, 10 December 2012

The First Few Days With Grade 6


I have only been teaching Grade 6 for two years. I have approached both years completly different. In my first year, I had two classes, all year long. We had so much time together. All of the projects were done in portfolios, so students were given 3-4 projects centered around a theme, and could work on any of the projects during the class. All the projects would then be due on one date. This year, we organized the Grade 6 classes differently. This year, I have 3 classes, who rotate through Art, Music and Foods. So, I am able to see the students twice throughout the year, but not necessarily twice in a row. This year, I have basically divided up the two sessions in Art into 2D, providing one assignment at a time (drawing, watercolor, collage, etc.) and 3D (mixed media, sculpture, clay, etc.) I am not quite sure which way I prefer, and maybe it depends on the timing and organization.

I really do love the Grade 6 students in the Art room. They are young enough that they don't question their creativity and ideas, yet old enough to create some really amazing artwork. They are excited, and enjoy being in school. They try almost everything I throw at them without worry or complaint, and are quite positive and open when having class discussions. They are ready and willing to learn, which is so beautiful. It is a really interesting age. They of course have their challenges, as any grade does, but overall, I really enjoy teaching this age.

Anyways, I was looking through my pictures and found a few gems from the first few days with my Grade 6 classes that I thought I would share with the world. The first few pictures were from our very first day of school. The Grade 6 students rotated into the art room for about 45 minutes each, and I needed something that was exciting, yet doable for the first time in the art room. I decided to do a large collaborative mural that would have a number of different sections to provide a number of different media and a variety of experiences at different levels of difficulty.
This was an old school sign that was found behind a bookcase! Perfect shape and size for a collaborative mural! I drew out squiggly sections before hand and planned out a a variety of media to use in each section. This was after day 1.
Zentangling on the left, and layered tissue paper with matte medium on the right.
Layered tissue paper on the left and yarn designs on the right.

Magazine roll ups! This station was quite hilarious, because the kids started to battle over who could make the largest, longest roll up. The really long ones unfortunately fell off...
I had anticipated that a lot more of the mural would be finished after day 1, so we turned it into the "I'm Finished" mural! So now, I have the stations in large ziplock bags, so when a student finishes an assignment early, I ask them which section on the mural they would like to work on, grab them the baggie, and they get to work! This way, there is never a student with nothing to do.

I am a little nervous that we are not going to have enough time to finish it. I am going to try and have a day every now and then that we can dedicate to the mural in hopes to get in finished. I guess it wouldn't be the end of the world to continue it next year in Grade 7, but my worry would be that they would get bored of it if it took that long. So the goal will remain to get it done this year. I'll keep you posted!

 The next few pictures that I found were from a few days into Grade 6 Art. I began the year, with short, in class activities that got them playing around with lines, colors and textures. The goals of the activities were not as much to teach specific skills, but more to get them experimenting and playing, not worrying about finished pieces. Secondly, they were to get them comfortable creating spontaneous art together, looking at each others art, and feeling safe in the art room to be creative and make mistakes.

This particular activity was called Abstract Continuous Line Exploration. This how I approaced it.
  1. Students were to grab 3 contrasting colors (any media, colored pencils, crayons, markers, etc). Here we discussed contrast, and why certain colors contrasted with others. 
  2. I told them that when I said go, they were to choose a first color, and begin to fill their page with one, continuous line. Their pencil was to stay on the paper, and they were to play around with shapes and using the entire space. 
  3. I gave them about 30 seconds, and gave verbal encouragement and advice as they drew. 
  4. Next, they were to choose a different color, and do another continuous line over their first. They could follow their previous marks, or cross over them. I gave them 20 seconds for this one. 
  5. They now took their 3rd color, and did one more continuous line with only about 15 seconds. 
  6. They now had to search for shapes that the three lines created and color them in. They could use any colors, patterns, and could choose any shapes, large and small. 
  7. We then got up and took at look at each others. 
  8. Then they got three more colors in a different media. We followed the same directions, except, before adding the next line, they passed their sketchbook to the person to the right. After the final 3rd line, they returned the sketchbook back to the original artist and then completed the final step of finding and coloring in the shapes.

This activity was really fun. It provided some good discussion points on artistic terminology such as abstract, collaborative, continuous lines, contrasting colors, organic versus geometrical lines, etc. It also had them create some extremely spontaneous, and then forced them to work from someone elses spontaneity! It also led us to a number of different in class activities such as continuous line observational drawings, and then blind contour drawing! It would make a really good sub plan as well!

Wednesday, 14 November 2012

To Collage or Not to Collage...

I have approached this project in a few different ways in my two year career as an art teacher, and each time, I think that I have improved the concept, but each time, I am still not sure. Let me take you through the journey of the Grade 7 Collage Assignment.

Attempt #1: The Collage Portfolio.
In my first year in the art room, I organized most assignments into themed portfolios which consisted of a few assignments. The first Collage Portfolio consisted of three collaging projects.

#1. Collaborative Color Wheel. In a group of three, on a large piece of Mayfair, they were to design an interesting twist on the regular color wheel, and collage in the colors using magazines.

#2. Color Collage. Students chose an image which they liked, and which was multi-tonal. The purpose of this collage was color matching. They had just studied the colors of the color wheel and practiced finding those colors in magazines. This was a continuation of this color matching skill.

#3. Grey Scale Collage, same size as the color collage, and of the same picture as the color collage. Instead of using magazines for this one though, they had to create a grey scale with their pencil, and then tear that up to create their grey scale collage. The purpose of this was to take the next step of studying colors, and matching them to different shades of grey. Which colors were closer to a light grey, which ones were closer to a dark shade?

It was immediately clear that there was way too much collage in this Portfolio. It took a very long time, the assignments were too large, and the students quickly got tired of the same, tedious techniques. On almost all course evaluations, students said that there was way too much collage. I still thought though that the collage technique, the color matching, combined the with transferred technique of grey scale matching, was an important skill to learn. So I modified it this year.

Attempt #2: Double Collages.
This year, I took out the collaborative color wheel collage. These students were in Grade 6 Art with me last year, and so they had done a previous color wheel assignment. I felt that they did not need to study those colors again. This time, we just did the two collages, the color and the grey scale, in the same way as before, but on paper half the size as last year. Some pictures from this are below.
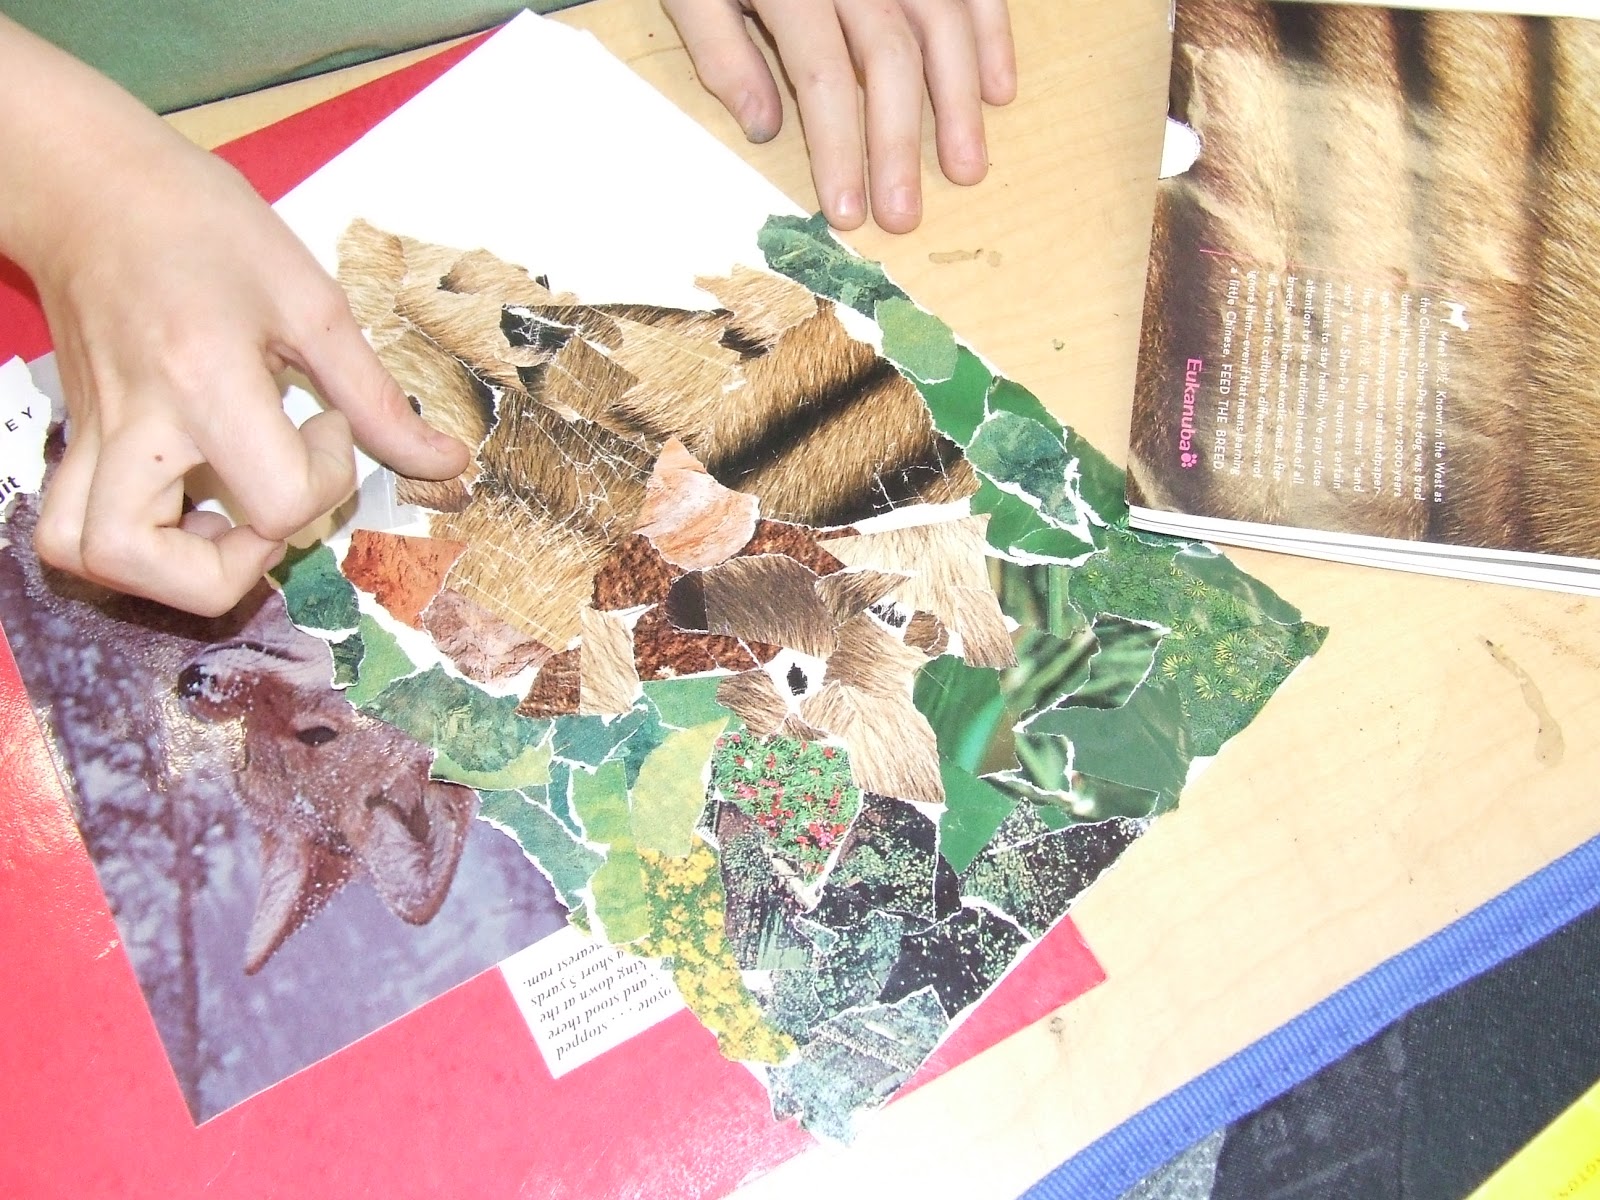
Color collage in the making.

Beautiful mosaic collage of a parrot.

The beginnings of a torn grey scale collage beside the completed color collage.

A beautifully finished bird, beside the beginnings of a mosaic grey scale collage.

The color collages turned out beautifully. The grey scale collages were much more difficult, and many did not turn out as the students did not use enough contrasting greys. There were too many middle greys used. In the course evaluation, many students said that they liked the color collage. They found ti challenging, but loved how they turned out. Many also said that the grey scale collage was too challenging. They found it difficult to match the colors with the shades of grey, and as a result, they felt discouraged by the process and the final product.

So, I have a new group of Grade 7 Art students, who will be beginning this project in a few weeks. I question a few things about this project and potential modifications...
  1. Should I go smaller? It is a tedious process, and I don't think that the size of the paper would make a difference in their achievement of the skill. Would they enjoy it more if it didn't take as long to reach the desired result?
  2. Just because a student finds the process tedious and in turn becomes frustrated, does that mean that it is necessarily an unworthy assignment? I don't think so, but an important part is the product, so if they are finding the process tedious, and the product is turning out poorly, that is when the assignment probably isn't working.
  3. Should I eliminate the grey scale collage, and just do the color collage? The students learn the skill of color matching, and end up having a positive experience with collaging. Is the addition of the grey scale collage ruining that positive experience? Is the skill of transferring color to a grey scale possibly too advanced, or unnecessary?
  4. Is the whole idea of the traditional collage too...traditional? Is there another way that I could get across the same skills sets of color matching?
So many questions... the big one remains... to collage, or not to collage...

Friday, 24 August 2012

Let's go back in time... Environmental Art!

Wow, I am amazed at how quickly the summer has gone by. I know, every teacher says the same thing, every summer, but I really felt it this time! I think it was because for the first time in my 27 years, I took the summer off! I did not get a summer job (well, other than an awesome week long musical theatre camp) It was glorious! I can not believe that I didn't take advantage of this summers off business earlier! I will not make that mistake again!

Not only has the summer flown by, but the time since my last post has flown by as well. Turns out, I am not the greatest at keeping up to date with blogging. I am going to work on that. I would like to get caught up with everything I have missed since my last post, and I will, but I am having technological difficulties with my camera... So, until I can get that figured out, I am going to go back in time, and over the next few posts, I am going to reminisce over some things that happened before my blogging days! To begin, I thought I would show one of my favorite activities that I have done with my art students.

This project was completed at the beginning last year, late September, early October, with my Grade 6 and 7 art students. This is a key time of the year for this project, as it was Environmental Art. The students were asked to go outside, within a specific area, and create art out of whatever they find on the ground.

We began this lesson looking at the work on Andy Goldsworthy. The image to the right shows one of his pieces sculpted completely out of snow, using only a stick! We discussed the aesthetics of his work, as well as the philosophy behind his work. The students absolutely loved it, and found it extremely interesting that he would complete his artwork entirely out of nature, take a picture, and then leave it!


We then went over a few rules for their own environmental artwork. They were to stay in the specified area. They could work by themselves, in partners, or in groups of 3. Finally, they could use anything that they found on the ground, but they could not take something that was alive, such as plants, leaves still on trees, flowers, etc. This is why fall was a perfect time to do this project, as there were lots of leaves that had fallen from the trees, in a variety of colors, giving them a broader range of materials to choose from.


Then I let them loose! They had a little under an hour to complete their work. I took pictures along the way, and took a finished picture at the end, one just of their artwork, and another of them with their artwork. Here are a few examples of what they created!

 The students had an absolute blast with this project. Not only was it nice to spend a class outside of the classroom, but they found it inspirational to be able to work with a different media, especially since it was all natural. I will definitely do this project again this year once the leaves start falling!
And of course, be sure to make some time to play in the leaves! :)

Monday, 7 May 2012

Transformation Portfolio

Here is the most recent portfolio completed by my Grade 6 students, and one of my favorite so far! I called it the Transformation Portfolio. The idea behind the name was taking a found object, and transforming it into something else. But, in retrospect, isn't all art transformational? Anyways, may have to rethink the name!
This portfolio consisted of three projects, an altered photograph, a wire sculpture and a collaborative altered book! Here are the project descriptions, as well as students examples from the Transformation Portfolio!

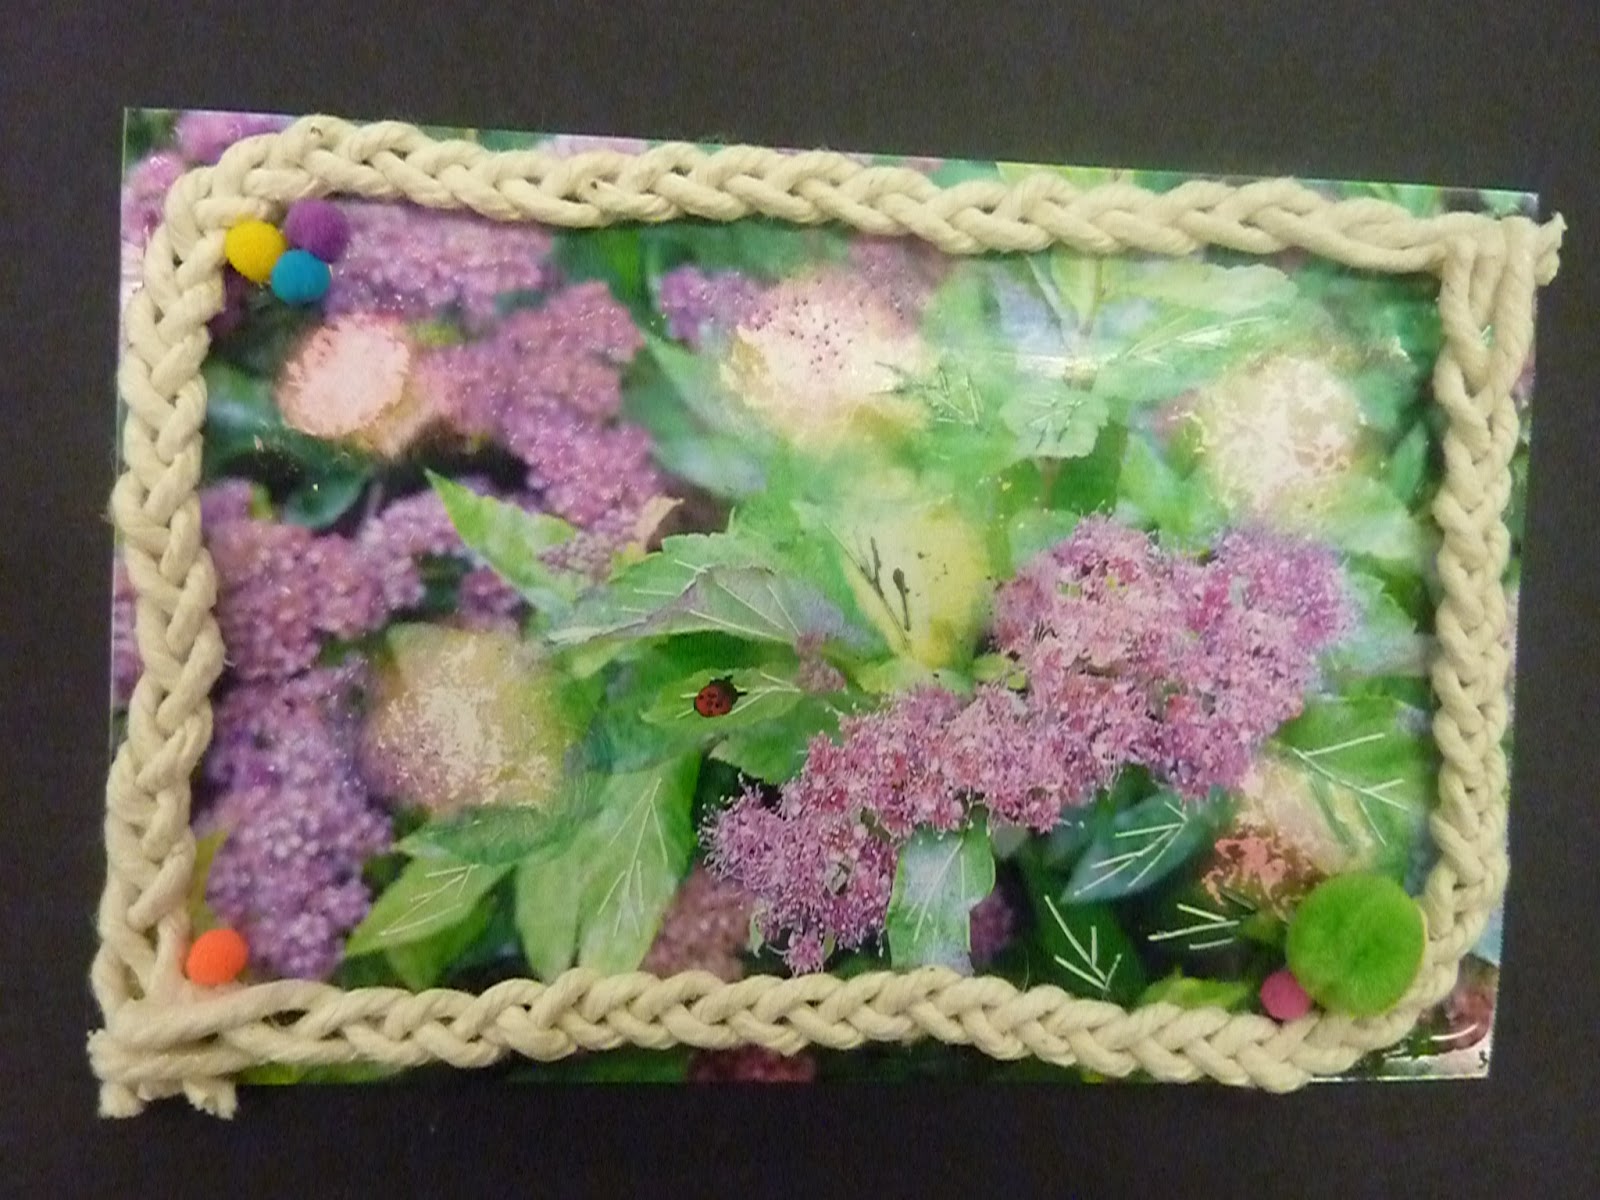
PROJECT #1: ALTERED PHOTOGRAPH - Student had to bring in a photograph, and using the subject matter in the photo, alter the surface! They could take away, or add on! Turned out great! Love what this student did with the different media! She really experimented!
This altered photograph is much more subtle, but she added that little ladybug that you see in the center! So cute!
PROJECT #2: WIRE SCULPTURE - This was the best project I have done yet as a teacher! Start with a piece of wood, and hammer in two nails to create the holes. Next get a coat hanger and cut off the hooked end. Have students twist the coat hanger into any shape they like. Try to encourage them to keep it abstract, and to try not to twist it with an idea in mind. Next, use a hot glue gun, and glue the coat hanger ends into the holes. Once that is dry, take a stocking, and stretch it all the way over and around the board. You then take white glue, water it down a bit, and coat the pantyhose with 2-3 coats, letting it dry in between each coat. Once the pantyhose is firm, the students can begin to look at their shape, and turn it into something! This is easy for some, and tricky for others, but it really is the fun part!
A toucan!
A wolf!
A person throwing up! Ewwwwww! I was super excited for this one!! This was created by a wonderful kid, but he literally can not sit down for longer than 1 minute. This is the first assignment that he sat, worked on, and finished ALL YEAR! So happy for him, and it turned out great!!!!
A shark!
A waterfall!
PROJECT #3: ALTERED BOOK - I absolutely love this project, but it turned out to be fairly complicated because I began it so late in the year. I provided the class with a picture book. I tried to choose books that had pages filled with different pictures and text (I actually scavenged the old library books that the library was getting rid of). Each student gets the book for  certain number of days. If I had started this earlier in the year, each student would have it for a week, but because I began so late, I had to create a complicated calendar system, as seen above! Each student gets to choose a two page spread, and must alter their pages to express what art means to them! There were no limitations on how they could do this, except for that they could not rip the page out! At the end, we will have one, massive book, that the entire class contributed to, almost like an art room yearbook! This project is still going, but here are a few pictures from a week ago!
After a few weeks, you are already unable to close the book. So excited to see it at the end!

String, paint, felt and sharpies!

This student chose to work around an image from her pages, adding to it by using collage!

Paint and tissue paper!

I will add more pictures of the Altered Book project as it goes. I love this project so much, I would like to do it every year! It is a beautiful memoir of the students of that year.

Extension!
ARTIST STATEMENTS - Because the students were so excited and proud of their wire sculptures, I decided to take that opportunity to get them talking about their art, and expressing why they did what they did through Artist Statements. First we talked about what an artist statement is and how to create one, then they sat down with their sculpture and went through a number of brainstorming questions to get them describing their artwork, both visually and thematically. They then used that brainstorm to create their artist statement, which are now on display beside their sculpture in the Learning Commons at our school!

Potential Addition!?
Have students incorporate a pic of themselves, make it more about them, and what art means to them. This will make it easier to remember, years later, which student created which page. It would also ask the students to create something more personal.

Question!?
I want the students to be able to remember this collaborative piece as well, but I have not quite figured out an easy way to do this. A picture of their pages for them? Pictures of everyone's pages burnt onto a CD? Still thinking about this...


Monday, 16 April 2012

Collage Portfolio

I really enjoy creating themed portfolios for my students, rather than one project at a time. I try to make each portfolio centered around a theme, utilizing a few different techniques, or media, or project styles. Each portfolio usually has 2-3 different projects, ranging in difficulty and effort, along with a open project, that must incorporate the theme.

I like this approach for a few different reasons.
ONE From what I have seen so far, every student can find something within each portfolio that they will be successful at, that they will find challenging and that they will be able to explore and feel creative. I feel that is so important for younger students, to get ample opportunities to express themselves, to confront challenges and to feel success.
TWO If a student does feel challenged or stuck at a certain project, they could set it aside and work on a different piece.
THREE I enjoy seeing students make connections that they may not have thought of before. Providing different projects around a particular theme, gets these connections started.

Here is an example of a recent portfolio that we just completed with my Grade 7 students, The Collage Portfolio. This portfolio had students practicing color theory, highlights and shadows, collage, and color matching.

Project #1: Collaborative Color Wheel - In small groups students were to design a complex color wheel, utilizing primary, secondary and tertiary colors. They then used magazines to find the color matches.

Project #2: Color Collage - Students were to choose a picture from the picture file that had a wide range of tones, highlights and shadows. Again, using magazines and their complex color wheel, they had to color match and recreate the image.

Project #3: Greyscale Collage - Students now had to transfer their knowledge of color, highlights and shadows to a greyscale. On scrap paper, student had to create crosshatched greyscale, then tear that up to create the collage.
In reflection, the process of this portfolio was great. It was a little too much collage though. I noticed the students getting sick of it by the end, which is never the reaction you want. If I were to do it again, I would make the required size smaller for the last two collages. I had them do it on 81/2x11 paper, this was just too big.

For the students who worked hard though, they created some amazing pieces! Here are a few more fabulous examples!
Project #1

Project #2 (sorry for the glare...)
I will be posting more examples for portfolios that I have done with my students, along with examples.